My Favorite Fujifilm X-T5 Film Recipes: Transform Your Photography with These Game-Changing Settings
As you might have read in my previous article, the Fujifilm X-T5 has revolutionized my photography workflow, and a huge part of that transformation comes from discovering the incredible world of film simulation recipes. These aren’t just simple presets – they’re carefully crafted combinations of settings that can completely transform the mood, tone, and aesthetic of your images straight out of camera. Today, I’m excited to share my three most-used film recipes that have become absolutely essential to my photography toolkit.
The Magic of Fujifilm Film Simulation Recipes
Before diving into the specific recipes, let me explain why film simulation recipes have become such a game-changer for Fujifilm X-T5 users. Unlike traditional post-processing workflows that require hours of editing, these recipes allow you to achieve stunning, film-like results directly in-camera. The X-T5’s powerful processor handles all the heavy lifting, giving you beautiful JPEGs that often require minimal to no additional editing.
What makes these recipes particularly special is how they leverage the X-T5’s advanced color science and processing capabilities. Each setting works in harmony with the others, creating a cohesive look that is so beautiful straight out the camera. The convenience factor alone is worth mentioning – being able to see your final image on the back of your camera immediately after capture is incredibly satisfying and helps improve your composition and exposure decisions in real-time.
Where I Found These Amazing Recipes
I discovered all three of these incredible film recipes on FujiXWeekly, a fantastic resource that has become my go-to destination for film simulation recipes. The website is run by passionate Fujifilm photographers who test and share their custom recipes with the community. While I’ve made some minor tweaks to suit my personal shooting style, these recipes are essentially 100% from FujiXWeekly, and I can’t recommend checking out their site enough for anyone looking to expand their film simulation toolkit.
The community aspect of FujiXWeekly is particularly valuable. Photographers from around the world share their creations, test different combinations, and provide feedback on what works best in various shooting conditions. It’s this collaborative spirit that makes the Fujifilm ecosystem so special and continues to push the boundaries of what’s possible with in-camera processing.
Recipe #1: High-Contrast Black and White Mastery
The ACROS + R High ISO Recipe
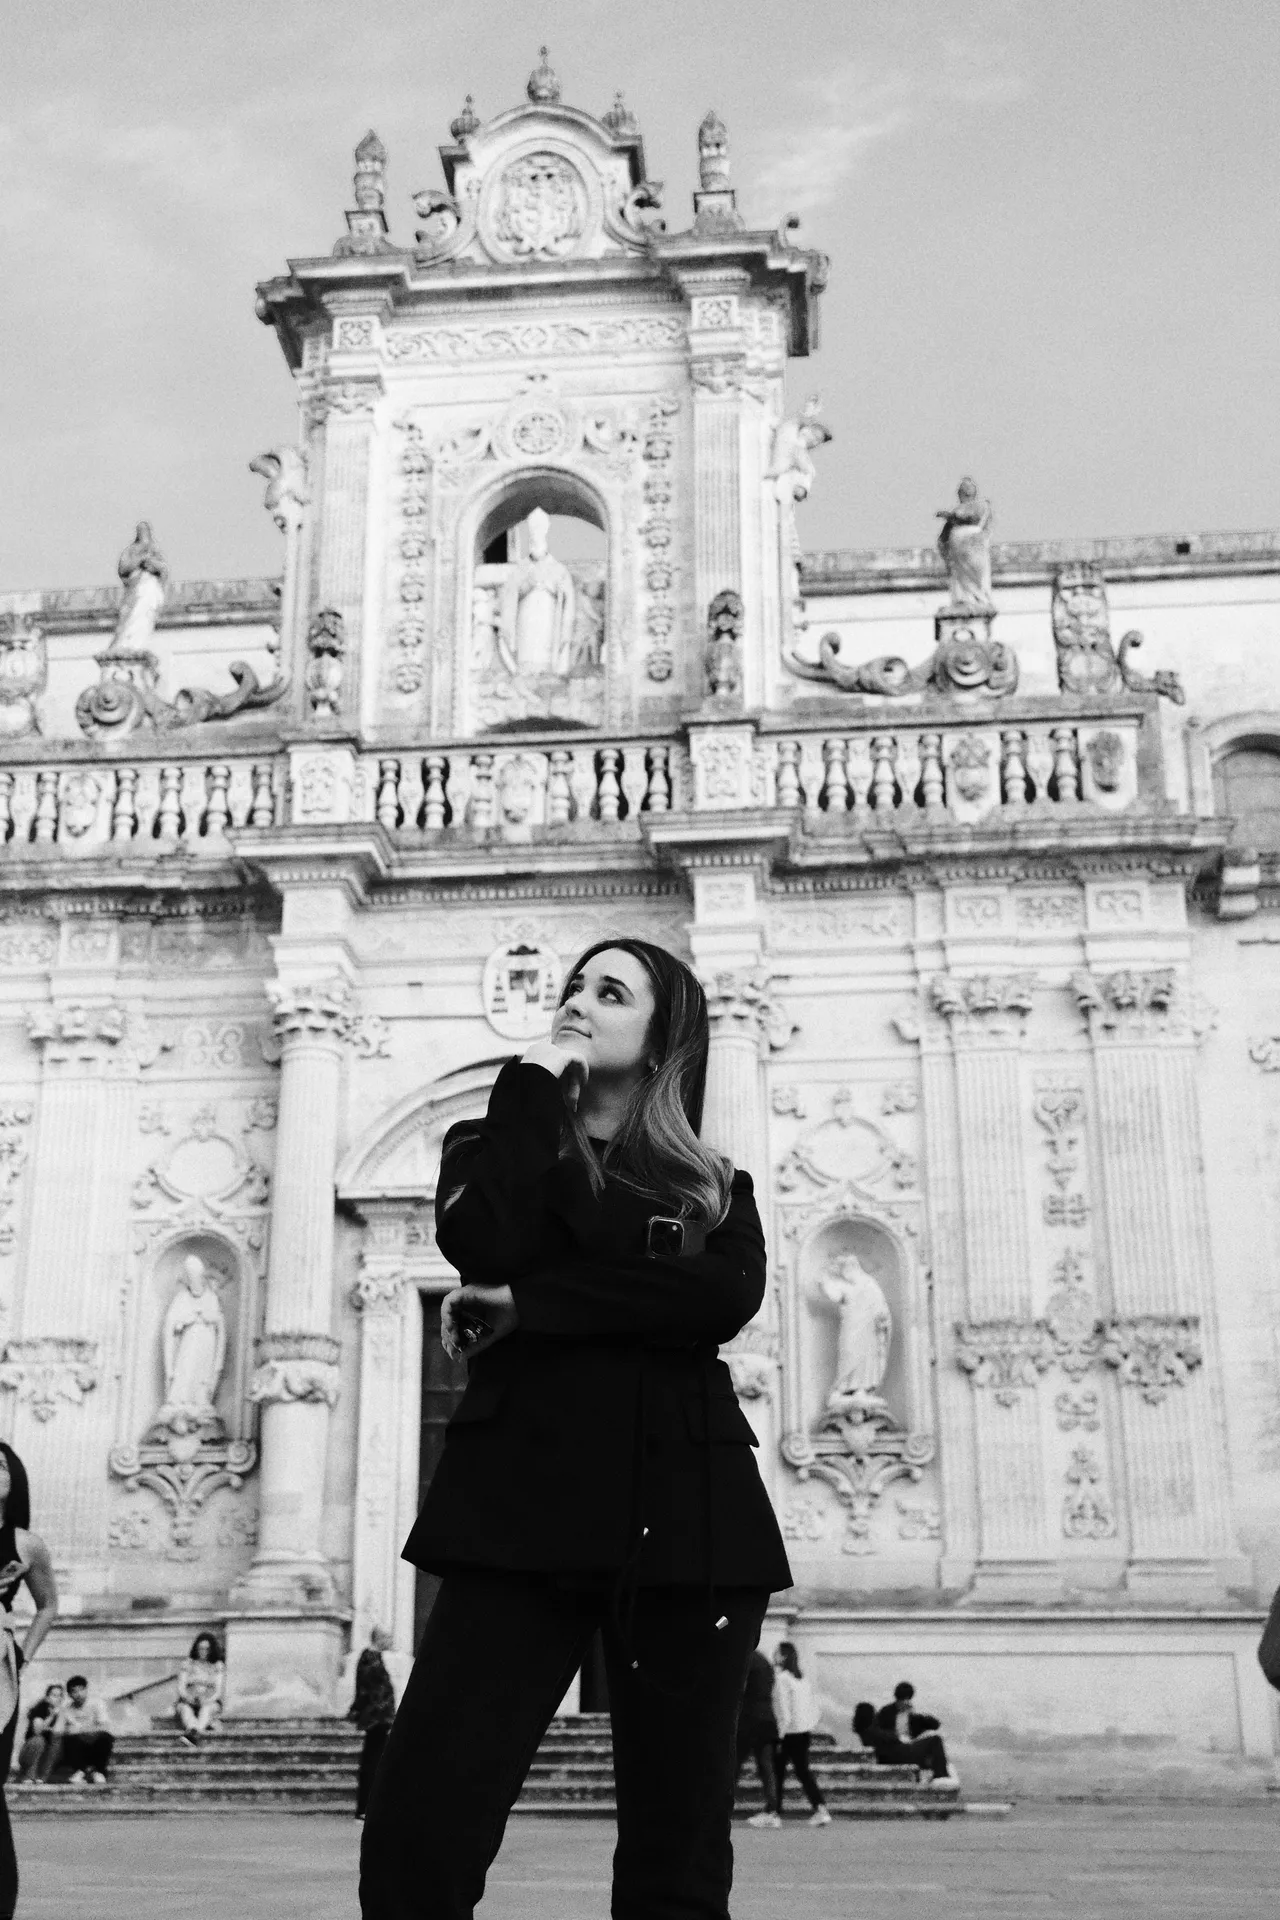
This first recipe is a black and white powerhouse that has completely changed how I approach monochrome photography. Built around the ACROS + R film simulation, this recipe excels in challenging lighting conditions and produces stunning results even at very high ISO settings.
The Complete Recipe:
- Film simulation: ACROS + R
- Dynamic Range: DR200
- Tone curve: H+3 and S+4
- Sharpness: -1
- High ISO NR: -4
Why This Recipe Works So Well
What makes this recipe special is how the additional settings enhance the natural strengths of the ACROS + R film simulation. The Dynamic Range setting of DR200 provides excellent highlight protection, which is crucial when shooting in high-contrast situations.
The tone curve adjustments are where this recipe really shines. The H+3 setting boosts the highlights, creating that classic film look with bright, airy tones that don’t blow out. Meanwhile, the S+4 shadow adjustment opens up the darker areas of the image, revealing detail that might otherwise be lost. This combination creates a beautiful balance that maintains the dramatic impact of black and white photography while preserving important detail throughout the tonal range.
High ISO Performance
One of the most impressive aspects of this recipe is its performance at high ISO settings. The High ISO NR setting of -4 might seem counterintuitive – why would you want less noise reduction? The answer lies in how film grain naturally behaves. Real film grain has character and adds to the aesthetic appeal of the image. By reducing the aggressive noise reduction, this recipe allows the natural grain structure to come through, creating a more authentic film-like appearance.
I’ve successfully used this recipe at ISO 6400 or even 12800, with results that are genuinely beautiful.
Practical Applications
This recipe excels in numerous shooting scenarios. Street photography benefits enormously from the high ISO capabilities and the dramatic contrast. Portrait photography takes on a timeless quality, especially when combined with strong directional lighting. Architecture and landscape photography gain a sense of gravitas and drama that’s hard to achieve with color images.
The sharpness setting of -1 deserves special mention. While it might seem like you’re sacrificing detail, this slight reduction in sharpness actually contributes to the organic, film-like quality of the final image.
Recipe #2: California Summer Vibes
The Nostalgic Neg Recipe for Golden Hour Magic
The second recipe captures the essence of those perfect California summer days – warm, nostalgic, and filled with golden light. Built around the Nostalgic Neg film simulation, this recipe creates images with a distinctly retro vibe that’s perfect for sunny outdoor photography.
The Complete Recipe:
- Film simulation: Nostalgic Neg
- Grain effect: Weak Small
- Color Chrome Effect: Strong
- Color Chrome FX Blue: Weak
- White Balance: 6700K R-1 and B-6
- Dynamic Range: DR400
- Tone curve: H-2 and S-1
- Color: +4
- Sharpness: -2
- High ISO NR: -4
- Clarity: -4
Understanding the Nostalgic Neg Foundation
The Nostalgic Neg film simulation naturally produces warm, slightly faded tones that evoke memories of old family photographs and vintage magazine shoots. This recipe takes that foundation and enhances it with carefully chosen settings that amplify its retro characteristics.
The grain effect setting of Weak Small adds just enough texture to enhance the film-like quality without overwhelming the image. This is crucial for maintaining the balance between character and clarity that makes this recipe so effective.
Color Science Magic
The color adjustments in this recipe are where the real magic happens. The Color Chrome Effect set to Strong enhances the saturation and depth of colors, particularly in the red and yellow spectrum. The Color Chrome FX Blue setting of Weak ensures that blue tones don’t become too overwhelming, maintaining the warm overall color palette.
The white balance adjustment to 6700K with R-1 and B-6 is particularly clever. This slightly warm white balance, combined with the red and blue adjustments, creates a consistent warm tone that works beautifully in bright sunlight. The result is images that feel like they were shot on warm summer afternoons, regardless of the actual lighting conditions.
The Dynamic Range Advantage
The DR400 setting is useful for handling the extreme contrast often found in bright, sunny conditions. This is essential for maintaining the dreamy, ethereal quality that makes this recipe so appealing.
Tone Curve Refinements
The tone curve adjustments of H-2 and S-1 work together to create a slightly compressed tonal range that’s characteristic of vintage film. The highlight reduction prevents the blown-out look that can occur in bright conditions, while the shadow adjustment maintains the moody, contrasty feel that gives the recipe its character.
The Color +4 setting significantly enhances the saturation, creating those rich, vibrant tones that are synonymous with classic California photography. Combined with the Sharpness -2 and Clarity -4 settings, this creates a soft, dreamy quality that’s perfect for lifestyle and travel photography.
Recipe #3: Eterna Sun – My Go-To Warm Tone Recipe
The Eterna Cinema Recipe That Defines My Style
The third and my most frequently used recipe is based on the Eterna Cinema film simulation, and I’ve dubbed it “Eterna Sun” because of the incredibly warm, inviting tones it produces.
The Complete Recipe:
- Film simulation: Eterna Cinema
- Grain effect: Weak Small
- Color Chrome Effect: Strong
- White Balance: Underwater R+1 and B-8
- Dynamic Range: DR400
- Tone curve: H-1 and S+2
- Color: -1
- Sharpness: +4
- High ISO NR: -2
The Eterna Cinema Advantage
Eterna Cinema is known for its exceptional dynamic range and beautiful color reproduction, making it an excellent foundation for a versatile recipe.
What sets Eterna apart is its natural, organic color palette and excellent skin tone reproduction. These characteristics make it perfect for portrait work, but as I’ve discovered, it’s equally effective for landscape, street, and lifestyle photography when enhanced with the right settings.
The Underwater White Balance Secret
The most unique aspect of this recipe is the use of the Underwater white balance setting. This might seem unusual for general photography, but the R+1 and B-8 adjustments create an incredibly warm, golden tone that’s absolutely beautiful. The underwater setting compensates for the blue cast typically found underwater, so when used in normal conditions, it creates a lovely warm bias that enhances the golden hour feel.
This white balance trick is what gives the recipe its distinctive character. It’s warm without being overwhelming, creating images that feel inviting and comfortable. Whether you’re shooting portraits, landscapes, or street scenes, this warmth adds emotional depth to your images.
Balancing Sharpness and Character
The Sharpness +4 setting might seem to contradict the film-like aesthetic, but it works beautifully with the other settings in this recipe. The increased sharpness provides excellent detail retention and creates images that look crisp and professional, while the other settings maintain the organic, film-like character.
Why I Use This Recipe Most Often
This recipe has become my default because of its incredible versatility and the consistently beautiful results it produces. The warm tones work well in almost any lighting condition, and the enhanced dynamic range ensures that I rarely lose detail in highlights or shadows. Whether I’m shooting during golden hour, in harsh midday sun, or even in overcast conditions, this recipe adapts beautifully. It just gives my photos a retro look that I’m so in love with!
Practical Tips for Using These Recipes
Getting Started with Film Simulation Recipes
If you’re new to film simulation recipes, start with one recipe and spend time really learning how it behaves in different conditions. Each recipe has its sweet spot, and understanding these nuances will help you get the most out of your X-T5.
I recommend starting with the Eterna Sun recipe since it’s the most versatile of the three. Once you’re comfortable with how it handles different lighting conditions, you can experiment with the other recipes for specific situations.
Customizing Recipes for Your Style
While I’ve found these recipes work beautifully as-is, don’t hesitate to make small adjustments to suit your personal style. The beauty of the X-T5’s film simulation system is how easily you can fine-tune individual parameters. Small changes to the tone curve, color saturation, or white balance can significantly impact the final look.
Keep notes on any adjustments you make and the conditions where they work best. This will help you develop your own signature recipes over time.
Shooting Considerations
When using these recipes, pay attention to your exposure. Film simulation recipes can handle a surprising amount of over and underexposure, but getting the exposure right in-camera will always give you the best results.
For the black and white recipe, remember that contrast is key. Look for scenes with strong directional light and interesting shadow patterns. The recipe will handle high ISO situations beautifully, so don’t be afraid to push the sensitivity when needed.
The Future of Film Simulation Photography
These recipes represent just the beginning of what’s possible with the X-T5’s film simulation capabilities. As more photographers experiment and share their creations, the community continues to discover new possibilities and push the boundaries of in-camera processing.
The convenience and quality of these recipes have fundamentally changed how I approach photography. Spending less time in post-processing means more time shooting and creating, which is ultimately what photography is all about. The X-T5, combined with these carefully crafted recipes, provides a tool that’s both technically excellent and creatively inspiring.
Whether you’re a professional photographer looking to streamline your workflow or an enthusiast wanting to explore the artistic possibilities of film simulation, these recipes offer a fantastic starting point.
I encourage you to visit FujiXWeekly to explore more recipes and join the community of photographers who are pushing the boundaries of what’s possible with Fujifilm’s exceptional film simulation technology!

